Styled to a ‘B’
BBStylish – attractive, customisable BBEdit Preview CSS
To repurpose a Douglas Adams line:
It can hardly be a coincidence that no language on Earth has ever produced the expression ‘As pretty as Times New Roman.’
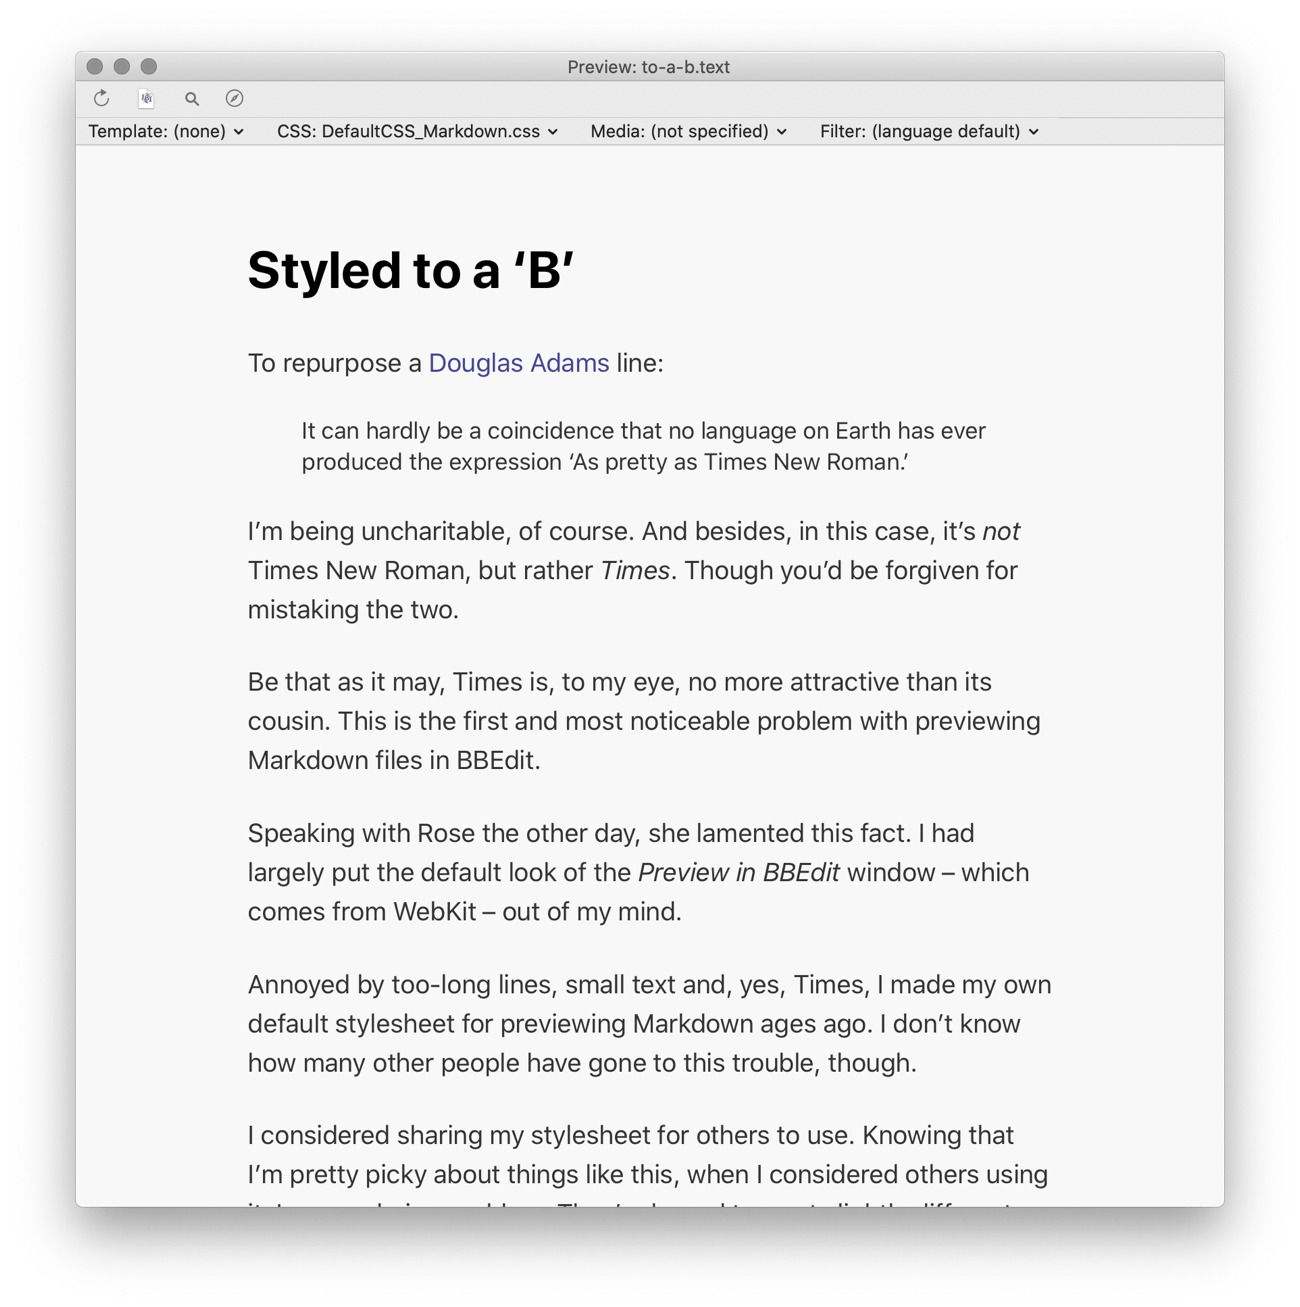
I’m being uncharitable, of course. And besides, in this case, it’s not Times New Roman, but rather Times. Though you’d be forgiven for mistaking the two. Be that as it may, Times is, to my eye, no more attractive than its cousin.
This is the first and most noticeable problem with previewing Markdown files in BBEdit.
Speaking with Rose the other day, she lamented this fact. I had largely put the default look of the Preview in BBEdit window – which comes from WebKit – out of my mind.
Annoyed by excessively long lines, small text and, yes, Times, I made my own default stylesheet for previewing Markdown ages ago. I don’t know how many other people have gone to this trouble, though.
I considered sharing my stylesheet for others to use. Knowing that I’m pretty picky about things like this, when I considered the idea, I saw a glaring problem. Other people are bound to want slightly different text sizes, fonts, colours – and all the rest. Fine, but will everyone be willing or able to edit the CSS?
Perhaps not, so I came up with another solution – I made a new stylesheet but made it approachable and more easily customisable. As is tradition, I named it with a ‘BB’ prefix and called it BBStylish.
Introducing BBStylish
BBStylish is a stylesheet for BBEdit’s Preview window that offers attractive defaults, but which can be customised with little to no knowledge of CSS.
Download BBStylish (Version 1)
How BBStylish works
You can customise BBStylish to better suit your preferences. Out of necessity this requires some precision, but I’ve tried to make it approachable, even if you’re not familiar or comfortable with CSS. Explanations and examples are given for each of the ‘settings’.
The setting (variable) is preceded by two hyphens and ends with a colon, like so:
--text-zoom:
Your setting goes after the colon, followed by a semicolon. Thus a full setting line looks like this:
--text-zoom: 120;
Important: This bears repeating – the line must end with a semicolon.
Apart from that, the other important note is that spaces and tabs are ignored, except between quotation marks.
How this works, more technically
I’ve made the setting system using CSS variables, calculations and by concealing the various units like em, ch and, for consistency, %. The variable names are understandable and there’s an excessive amount of comments to explain what each does, and how to edit them to get the desired effect.
Thus, to change the line height in the Preview window, and have it affect – and keep beautiful – the rest of the page, you need only edit the value for one line instead of eight:
--line-height: 1.65;
In the case of line height, a unit isn’t necessary. But for others, like --footer-space, it is. I hide this away and only ask the user enter a number. Then, in the body selector I use the calc function to effectively convert it (second line):
margin-top: calc( (var(--line-height) * 2.5rem) +
                  (var(--footer-space) * 1rem) );
The converted value is added to the default to help ensure the layout stays attractive and readable. Negative numbers also work.
How to use BBStylish
The DefaultCSS_Markdown.css file must be placed in the Preview CSS folder of BBEdit’s Application Support folder. The easiest way to open that folder is from the menu bar: choose BBEdit › Folders › Preview CSS and drag the file to the folder.
Then, write.
When you’re ready, open the Preview window: Markup › Preview in BBEdit (⌃⌘P)
Note: If the name of the file is left unmodified, BBStylish will be used as the default stylesheet when you preview any Markdown file. If you don’t want that, rename the file and ensure that the .css extension is maintained. When you want to use it, choose the file from the ‘CSS’ pop-up menu in the Preview window.
Customising BBStylish
All the instructions for editing the settings for BBStylish are included in the file. And obviously the best way to edit the file is in BBEdit.
You can open the file directly from the Preview window, hold down the Option (⌥) key as you choose the file from the CSS pop-up menu. When you save the file, the changes are reflected immediately.
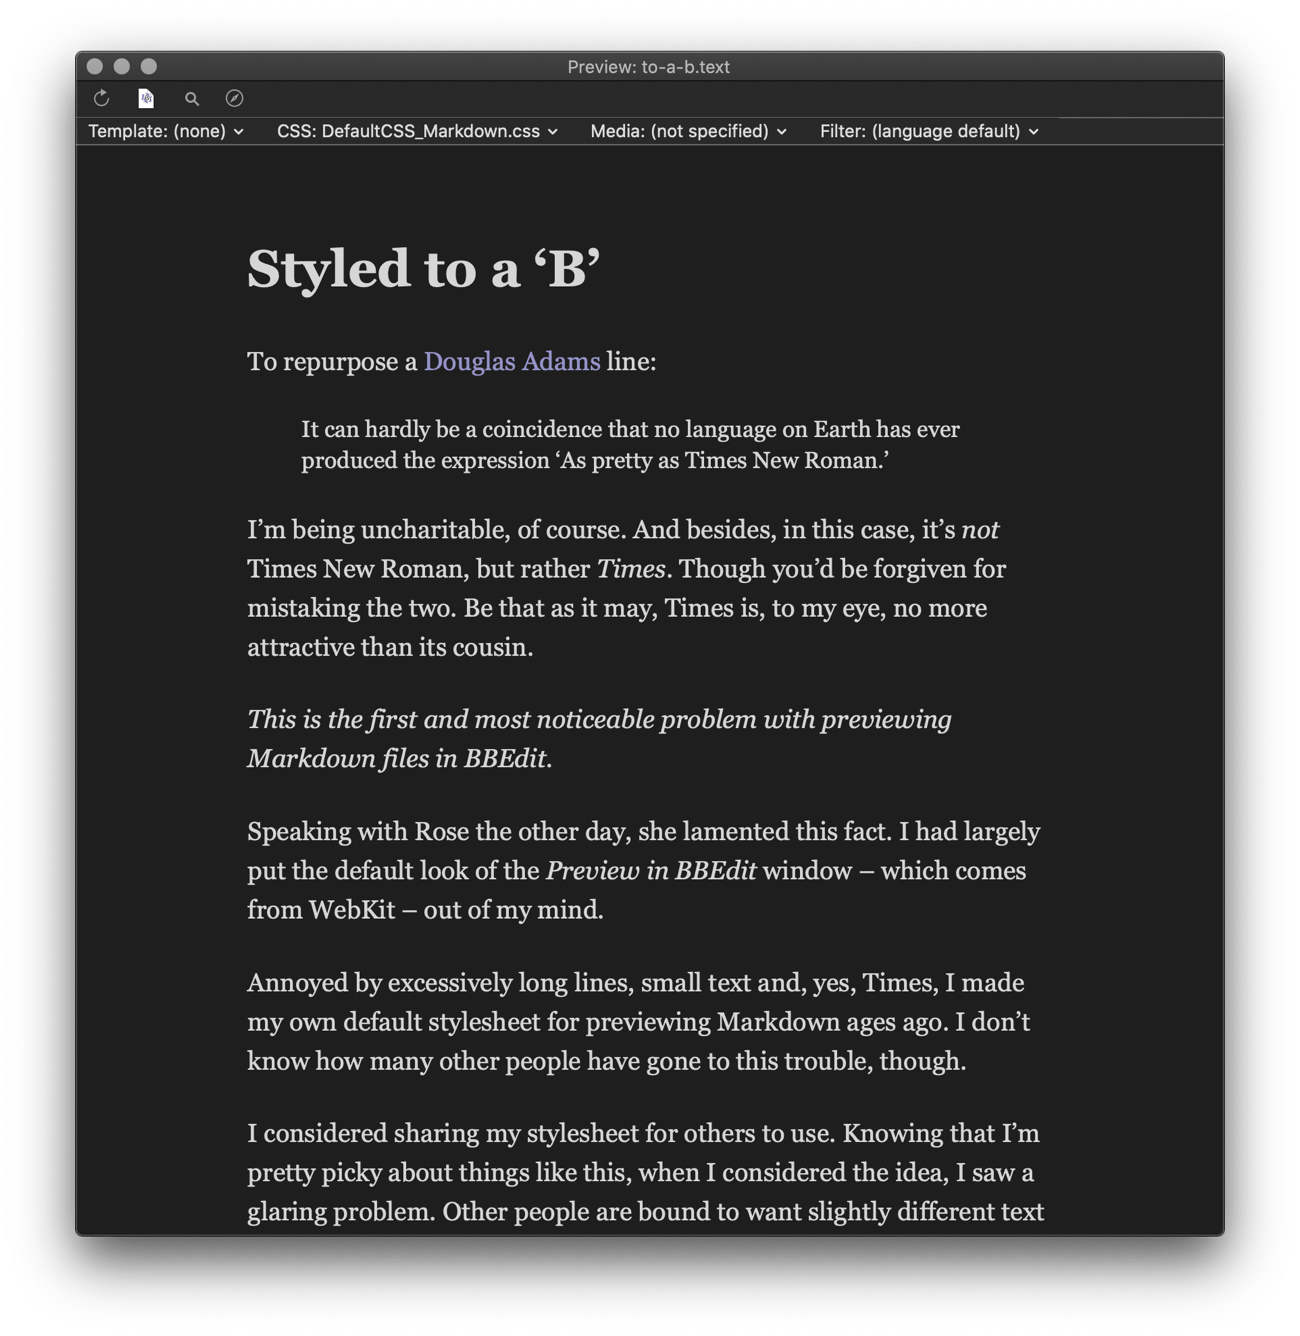
Dark Mode and BBStylish
When your system appearance, or the BBEdit appearance, is set to dark, BBStylish will use the --dark-mode- colours specified in the file. Enjoy.
If you always want the light or dark version, despite the appearance, duplicate the desired colour values to be the same for both sets.
Font choices
Every Mac comes with some fantastic typefaces you could use for BBStylish. I chose the system San Francisco font as the default because it pretty much always looks good. Georgia can also look nice:
Excellent choices abound – Gill Sans and Hoefler Text, for example – try different ones, with different text zoom factors and line heights, to find your favourite.
Fortunately BBEdit can, unlike Safari, still access your locally-installed fonts so anything you’ve got installed is also fair game.
I love the Preview in BBEdit window. I use it for previewing articles on my site, checking work-in-progress NetNewsWire Help Book files, and of course, previewing any Markdown file. I hope this will make you love it a bit more too.
If you have any questions, comments or suggestions about BBStylish, please email me at rd@nostodnayr.net.